How to create a Cloud image Ubuntu from scratch
This procedure shows how to create a cloud image Ubuntu from scratch to run on Cloud environments (EC2, GCE, Azure, QEMU, OpenStack and VirtualBox).

Prerequisites (GNU/Linux Debian/Ubuntu)
Install applications we need to build the environment.
sudo apt-get install \
   debootstrap \
   qemu-utils \
   qemu-system \
   genisoimage
mkdir $HOME/cloud-image-ubuntu-from-scratch
Create loop device
-
Access build directory
cd $HOME/cloud-image-ubuntu-from-scratch -
Create empty virtual hard drive file (
30Gb)dd if=/dev/zero of=cloud-ubuntu-image.raw bs=1 count=0 seek=32212254720 status=progress -
Create partitions on file
sed -e 's/\s*\([\+0-9a-zA-Z]*\).*/\1/' << EOF | sudo fdisk cloud-ubuntu-image.raw o # clear the in memory partition table n # new partition p # primary partition 1 # partition number 1 # default - start at beginning of disk +512M # 512 MB boot parttion n # new partition p # primary partition 2 # partion number 2 # default, start immediately after preceding partition # default, extend partition to end of disk a # make a partition bootable 1 # bootable partition is partition 1 -- /dev/loop0p1 p # print the in-memory partition table w # write the partition table q # and we're done EOF -
Start loop device
sudo losetup -fP cloud-ubuntu-image.rawCheck loop device
sudo losetup -aOutput
/dev/loop0: [64775]:24650558 (/home/mvallim/cloud-image-ubuntu-from-scratch/cloud-ubuntu-image.raw) -
Check partitions on loop device
sudo fdisk -l /dev/loop0Output
Disk /dev/loop0: 30 GiB, 32212254720 bytes, 62914560 sectors
Units: sectors of 1 * 512 = 512 bytes
Sector size (logical/physical): 512 bytes / 512 bytes
I/O size (minimum/optimal): 512 bytes / 512 bytes
Disklabel type: dos
Disk identifier: 0xf4e11bd3

Device       Boot   Start      End  Sectors  Size Id Type
/dev/loop0p1 *       2048  1050623  1048576  512M 83 Linux
/dev/loop0p2      1050624 62914559 61863936 29.5G 83 Linux
Format partitions loop device
-
Format device loop0p1 (/boot)
sudo mkfs.ext4 /dev/loop0p1Output
mke2fs 1.44.5 (15-Dec-2018) Discarding device blocks: done Creating filesystem with 131072 4k blocks and 32768 inodes Filesystem UUID: 4d426158-5c62-4b8c-8dcb-52c47e83df3e Superblock backups stored on blocks: 32768, 98304 Allocating group tables: done Writing inode tables: done Creating journal (4096 blocks): done Writing superblocks and filesystem accounting information: done -
Format device loop0p2 (/)
sudo mkfs.ext4 /dev/loop0p2Output
mke2fs 1.44.5 (15-Dec-2018)
Discarding device blocks: done
Creating filesystem with 7732992 4k blocks and 1933312 inodes
Filesystem UUID: 88086414-602f-4099-a112-c94a1c6a13f5
Superblock backups stored on blocks:
      32768, 98304, 163840, 229376, 294912, 819200, 884736, 1605632, 2654208,
      4096000

Allocating group tables: done
Writing inode tables: done
Creating journal (32768 blocks): done
Writing superblocks and filesystem accounting information: done
Mount loop devices
-
Access build directory
cd $HOME/cloud-image-ubuntu-from-scratch -
Create
chrootdirectorymkdir chroot -
Mount
rootpartitionsudo mount /dev/loop0p2 chroot/ -
Mount
bootpartitionFirst you need create directory…
sudo mkdir chroot/boot… and mount
bootpartitionsudo mount /dev/loop0p1 chroot/boot
Bootstrap and Configure Ubuntu
-
Checkout bootstrap
sudo debootstrap \
   --arch=amd64 \
   --variant=minbase \
   --components "main,universe" \
   --include "ca-certificates,cron,iptables,isc-dhcp-client,libnss-myhostname,ntp,ntpdate,rsyslog,ssh,sudo,dialog,whiptail,man-db,curl,dosfstools,e2fsck-static" \
   bionic \
   $HOME/cloud-image-ubuntu-from-scratch/chroot \
   http://us.archive.ubuntu.com/ubuntu/
debootstrap is used to create a Debian base system from scratch, without requiring the availability of dpkg or apt. It does this by downloading .deb files from a mirror site, and carefully unpacking them into a directory which can eventually be chrooted into.
-
Configure external mount points
sudo mount --bind /dev $HOME/cloud-image-ubuntu-from-scratch/chroot/dev

sudo mount --bind /run $HOME/cloud-image-ubuntu-from-scratch/chroot/run
As we will be updating and installing packages (grub among them), these mount points are necessary inside the chroot environment, so we are able to finish the installation without errors.
Define chroot environment
A chroot on Unix operating systems is an operation that changes the apparent root directory for the current running process and its children. A program that is run in such a modified environment cannot name (and therefore normally cannot access) files outside the designated directory tree. The term “chroot” may refer to the chroot system call or the chroot wrapper program. The modified environment is called a chroot jail.
Reference: https://en.wikipedia.org/wiki/Chroot
-
Access chroot environment
sudo chroot $HOME/cloud-image-ubuntu-from-scratch/chroot -
Configure mount points, home and locale
mount none -t proc /proc

mount none -t sysfs /sys

mount none -t devpts /dev/pts

export HOME=/root

export LC_ALL=C
These mount points are necessary inside the chroot environment, so we are able to finish the installation without errors.
-
Set a custom hostname
echo "ubuntu-image" > /etc/hostname -
Configure apt sources.list
cat <<EOF > /etc/apt/sources.list deb http://us.archive.ubuntu.com/ubuntu/ bionic main restricted universe multiverse deb-src http://us.archive.ubuntu.com/ubuntu/ bionic main restricted universe multiverse deb http://us.archive.ubuntu.com/ubuntu/ bionic-security main restricted universe multiverse deb-src http://us.archive.ubuntu.com/ubuntu/ bionic-security main restricted universe multiverse deb http://us.archive.ubuntu.com/ubuntu/ bionic-updates main restricted universe multiverse deb-src http://us.archive.ubuntu.com/ubuntu/ bionic-updates main restricted universe multiverse EOF -
Configure
fstabcat <<EOF > /etc/fstab # /etc/fstab: static file system information. # # Use 'blkid' to print the universally unique identifier for a # device; this may be used with UUID= as a more robust way to name devices # that works even if disks are added and removed. See fstab(5). # # <file system> <mount point> <type> <options> <dump> <pass> /dev/sda2 / ext4 errors=remount-ro 0 1 /dev/sda1 /boot ext4 defaults 0 2 EOF -
Update indexes packages
apt-get update -
Install systemd
apt-get install -y systemd-sysvsystemd is a system and service manager for Linux. It provides aggressive parallelization capabilities, uses socket and D-Bus activation for starting services, offers on-demand starting of daemons, keeps track of processes using Linux control groups, maintains mount and automount points and implements an elaborate transactional dependency-based service control logic.
-
Configure machine-id and divert
dbus-uuidgen > /etc/machine-id

ln -fs /etc/machine-id /var/lib/dbus/machine-id
The
/etc/machine-idfile contains the unique machine ID of the local system that is set during installation or boot. The machine ID is a single newline-terminated, hexadecimal, 32-character, lowercase ID. When decoded from hexadecimal, this corresponds to a 16-byte/128-bit value. This ID may not be all zeros.dpkg-divert --local --rename --add /sbin/initctl ln -s /bin/true /sbin/initctldpkg-divert is the utility used to set up and update the list of diversions.
-
Install packages needed for system
apt-get install -y \
    os-prober \
    ifupdown \
    network-manager \
    resolvconf \
    locales \
    build-essential \
    module-assistant \
    cloud-init \
    grub-pc \
    grub2 \
    linux-generic
The next steps will appear, as a result of the packages that will be installed from the previous step, this will happen without anything having to be informed or executed.
- Configure grub
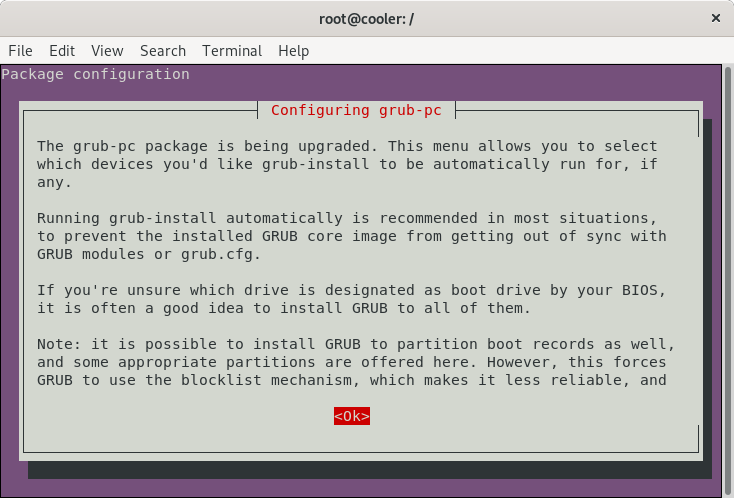
- Don’t select any options
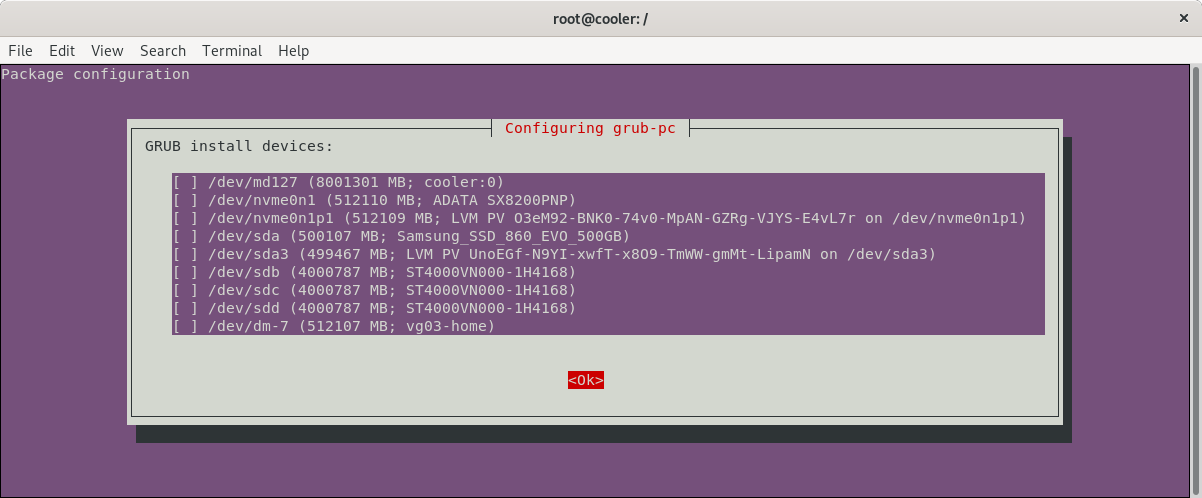
- Only confirm “Yes”
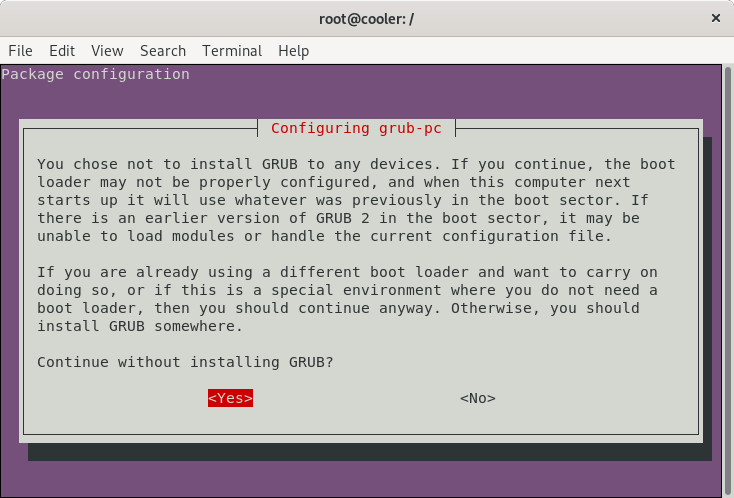
- Configure grub
-
Configure
interfacescat <<EOF > /etc/network/interfaces # This file describes the network interfaces available on your system # and how to activate them. For more information, see interfaces(5). source /etc/network/interfaces.d/* # The loopback network interface auto lo iface lo inet loopback EOF -
Reconfigure packages
-
Generate locales
dpkg-reconfigure locales- Select locales
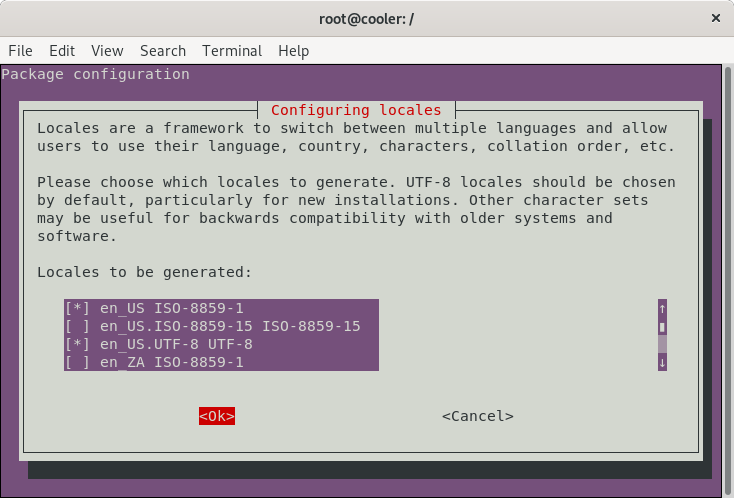
- Select default locale
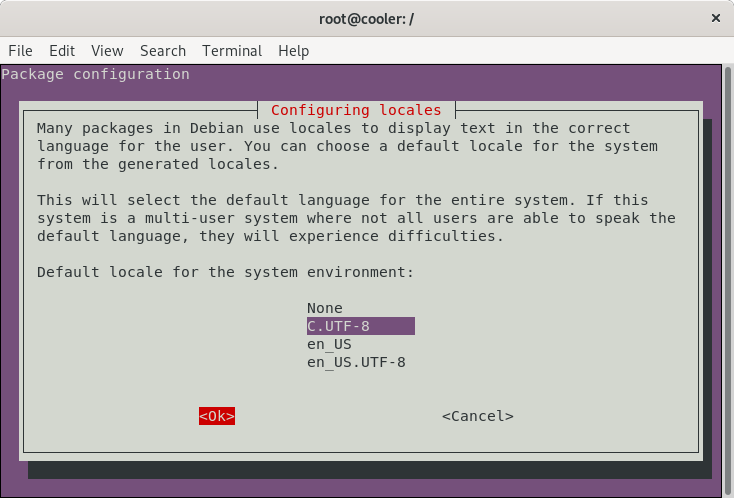
- Select locales
-
Reconfigure resolvconf
dpkg-reconfigure resolvconf- Confirm changes
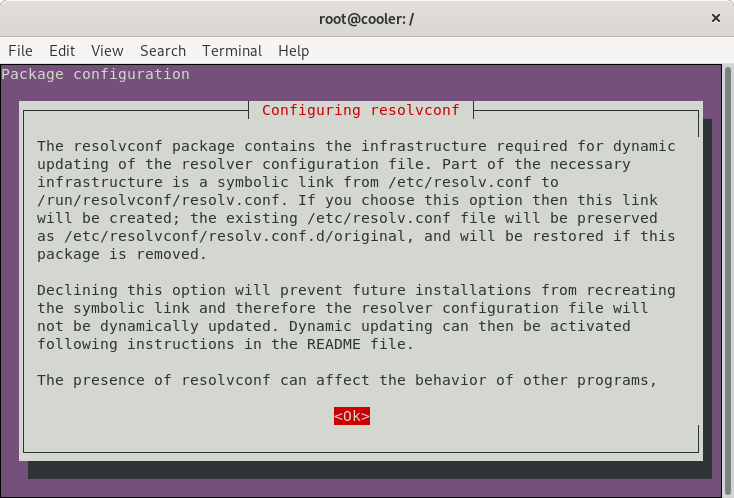
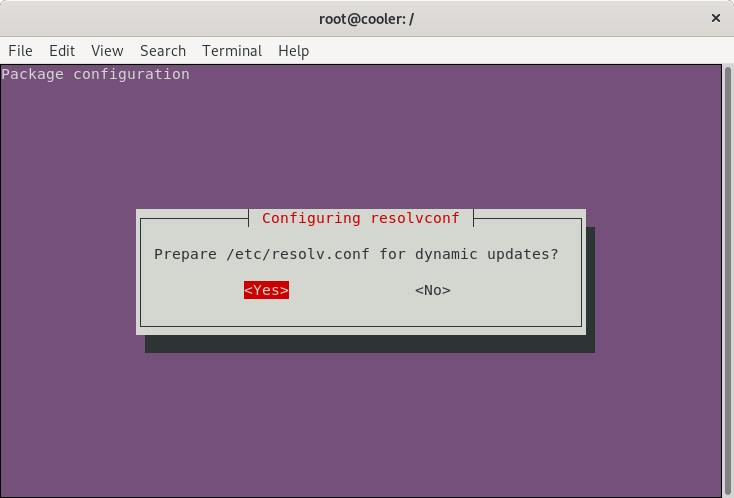
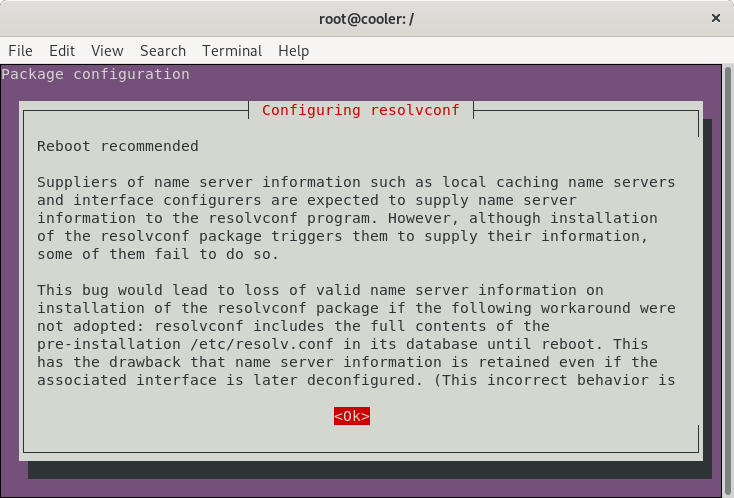
- Confirm changes
-
Configure network-manager
cat <<EOF > /etc/NetworkManager/NetworkManager.conf [main] rc-manager=resolvconf plugins=ifupdown,keyfile dns=default [ifupdown] managed=false EOF -
Reconfigure network-manager
dpkg-reconfigure network-manager
-
-
Install
grub-
Install
grub-install /dev/loop0Output
Installing for i386-pc platform. Installation finished. No error reported. -
Update grub configuration
update-grubOutput
Sourcing file `/etc/default/grub'
Generating grub configuration file ...
Found linux image: /boot/vmlinuz-4.15.0-74-generic
Found initrd image: /boot/initrd.img-4.15.0-74-generic
Adding boot menu entry for EFI firmware configuration
done
-
VirtualBox
If you plan to use this image in VirtualBox, install VirtualBox Guest Additions
-
Download VirtualBox Guest Additions
curl --progress-bar https://download.virtualbox.org/virtualbox/6.1.38/VBoxGuestAdditions_6.1.38.iso -o VBoxGuestAdditions_6.1.38.iso -
Mount ISO
mount -o loop VBoxGuestAdditions_6.1.38.iso /mnt -
Install
/mnt/VBoxLinuxAdditions.runOutput like this
Verifying archive integrity... All good. Uncompressing VirtualBox 6.1.38 Guest Additions for Linux........ VirtualBox Guest Additions installer Copying additional installer modules ... Installing additional modules ... depmod: ERROR: could not open directory /lib/modules/4.19.0-6-amd64: No such file or directory depmod: FATAL: could not search modules: No such file or directory VirtualBox Guest Additions: Starting. VirtualBox Guest Additions: Building the VirtualBox Guest Additions kernel modules. This may take a while. VirtualBox Guest Additions: To build modules for other installed kernels, run VirtualBox Guest Additions: /sbin/rcvboxadd quicksetup <version> VirtualBox Guest Additions: or VirtualBox Guest Additions: /sbin/rcvboxadd quicksetup all VirtualBox Guest Additions: Kernel headers not found for target kernel 4.19.0-6-amd64. Please install them and execute /sbin/rcvboxadd setup modprobe vboxguest failed The log file /var/log/vboxadd-setup.log may contain further information. Running in chroot, ignoring request: daemon-reload -
Generate modules inside
chrootenvironmentls -al /lib/modulesOutput
 total 12
 drwxr-xr-x  3 root root 4096 Jan 25 22:29 .
 drwxr-xr-x 14 root root 4096 Jan 25 22:29 ..
 drwxr-xr-x  5 root root 4096 Jan 25 22:29 4.15.0-74-generic
Use the same name listed before 4.15.0-74-generic
rcvboxadd quicksetup 4.15.0-74-genericOutput like this
VirtualBox Guest Additions: Building the modules for kernel 4.15.0-74-generic. update-initramfs: Generating /boot/initrd.img-4.15.0-74-generic Warning: /sbin/fsck.vfat doesn't exist, can't install to initramfs, ignoring. -
Umount and remove ISO
umount /mnt rm -rf VBoxGuestAdditions_6.1.38.iso -
Fix
vboxadd-servicesed -i -e 's/ systemd-timesyncd.service//g' /lib/systemd/system/vboxadd-service.service
Azure
If you plan to use this image in Azure, install the Azure agent
-
Install the latest package version
apt-get install walinuxagent -
Ensure auto update is enabled
First, check to see if it is enabled:
cat /etc/waagent.conf | grep AutoUpdate.EnabledFind ‘AutoUpdate.Enabled’. If you see this output, it is enabled:
# AutoUpdate.Enabled=y -
To enable run:
sudo sed -i 's/# AutoUpdate.Enabled=n/AutoUpdate.Enabled=y/g' /etc/waagent.conf
Cleanup the chroot environment
-
If you installed software, be sure to run
truncate -s 0 /etc/machine-id -
Remove the diversion
rm /sbin/initctl dpkg-divert --rename --remove /sbin/initctl -
Clean up
 apt-get clean

 rm -rf /tmp/* ~/.bash_history

 umount /proc

 umount /sys

 umount /dev/pts

 export HISTSIZE=0

 exit
Unbind mount points
sudo umount $HOME/cloud-image-ubuntu-from-scratch/chroot/dev

sudo umount $HOME/cloud-image-ubuntu-from-scratch/chroot/run
Umount loop partitions
sudo umount $HOME/cloud-image-ubuntu-from-scratch/chroot/boot

sudo umount $HOME/cloud-image-ubuntu-from-scratch/chroot
Leave loop device
sudo losetup -D
Conclusion
At the end the image produced is in cloud-ubuntu-image.raw.
Now you can use this raw image and import it into your favorite cloud.
Each cloud has a process for importing which we will not deal with here.
Test image
-
Convert
rawimage toqcow2qemu-img convert -f raw cloud-ubuntu-image.raw -O qcow2 ubuntu-image.qcow2 -
Create a simple
user-dataintilizercloud-initGenerate hash passwd ‘ubuntu’
openssl passwd -6 ubuntuOutput
$6$vcSilJc5EkAaj/sE$RfHgGqzKQ/iVHvFObi8acrKFeLUcNAHH7YPT7hP7euIB5m8p.rbxxntrgyFalFG6eKlKE/OLCq6L2Fu/NWZi4/Use this value on user-data yml file
cat <<EOF > user-data #cloud-config users: - name: ubuntu passwd: \$6\$vcSilJc5EkAaj/sE\$RfHgGqzKQ/iVHvFObi8acrKFeLUcNAHH7YPT7hP7euIB5m8p.rbxxntrgyFalFG6eKlKE/OLCq6L2Fu/NWZi4/ lock_passwd: false sudo: ['ALL=(ALL) NOPASSWD:ALL'] shell: /bin/bash power_state: mode: reboot timeout: 30 condition: true EOF -
Create a simple
meta-dataintilizercloud-initcat <<EOF > meta-data local-hostname: instance-test EOF -
Create a disk to attach with Cloud-Init configuration
genisoimage \
   -output instance-test-cidata.iso \
   -input-charset utf-8 \
   -volid cidata \
   -joliet \
   -rock \
   user-data meta-data
Output
Total translation table size: 0 Total rockridge attributes bytes: 331 Total directory bytes: 0 Path table size(bytes): 10 Max brk space used 0 183 extents written (0 MB) -
Launch virtual machine
qemu-system-x86_64 \ -m 512 \ -hda ubuntu-image.qcow2 \ -cdrom instance-test-cidata.iso \ -enable-kvm \ -net nic \ -net user -
Login on image
Use user
ubuntuand passwordubuntu, previously configured in step 2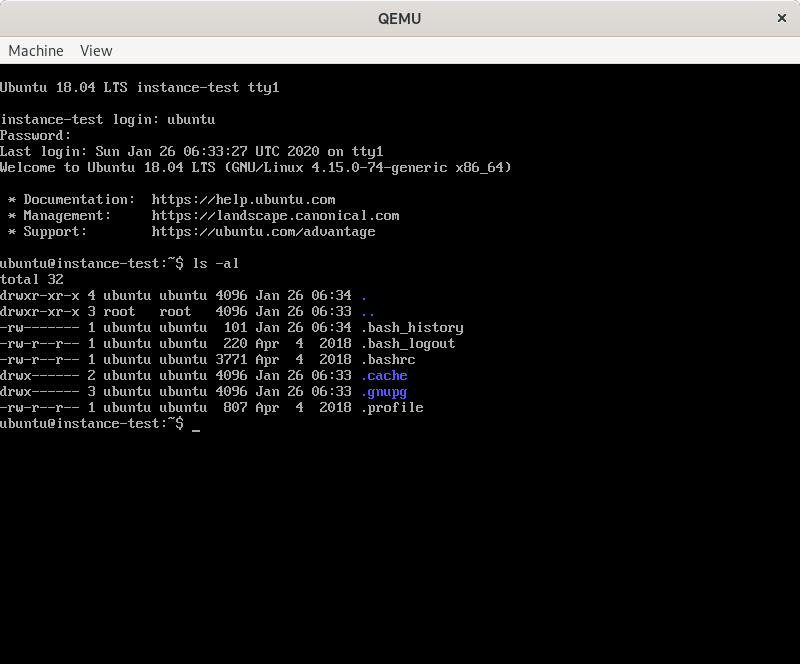
Contributing
Please read CONTRIBUTING.md for details on our code of conduct, and the process for submitting pull requests to us.
Versioning
We use GitHub for versioning. For the versions available, see the tags on this repository.
Authors
- Marcos Vallim - Initial work, Development, Test, Documentation - mvallim
See also the list of contributors who participated in this project.
License
This project is licensed under the Apache License - see the LICENSE file for details