How to create the external CA Infrastructure
Certificates and requirements
Kubernetes requires PKI certificates for authentication over TLS. If you install Kubernetes with kubeadm, the certificates that your cluster requires are automatically generated. You can also generate your own certificates – for example, to keep your private keys more secure by not storing them on the API server. This page explains how to generate and install your own certificates.
Full referenced here: https://kubernetes.io/docs/setup/best-practices/certificates/
Root and Intermediate CAs

What is the purpose of the Intermediate CA certificate
To improve the security of the root certificate, we will create two intermediate certificates from which SSL certificates are signed and issued.
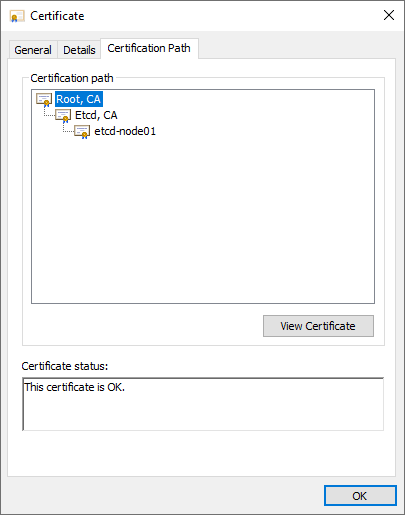
An intermediate certificate is a subordinate certificate issued by the trusted root, specifically for issuing server certificates for the final subject. The result is a chain of certificates that starts at the trusted root CA, includes the intermediary certificates and ends with the SSL certificate issued to you. These certificates are called chained root certificates.
Creating certificates directly from the root certificate of the CA increases the risk of compromising the root certificate, and if the root certificate is compromised, the entire trust infrastructure created by the SSL provider will fail. The use of intermediate certificates to issue SSL certificates to final entities, therefore, provides an additional layer of security. You must install the intermediate certificates on your server together with the issued SSL certificate to complete the trusted chain and make the certificate effective.
The use of intermediate certificates does not cause any installation, performance or compatibility issues.
A little analogy for better understanding this concept
Once upon a time, there was a kingdom known as Cluster Land. In this kingdom, there was no currency that allowed people to trade with each other. All the commerce happened through bartering.
One day, many king’s subjects started complaining about how the bartering process wasn’t fair. The king, a very wise man, decided to create a currency called Cluster Coins. The coins were supposed to be created by the king’s subjects themselves, using a special material (silver) and a press provided by the king’s wedges. This was a just in-time process and happened everytime the king’s subjects made formal requests to do so.
At first, this process worked really well, and currency began to circulate in the reign. The trading was perceived as being very fair, and everybody was pretty happy with this new model.
One day though, somebody realized the amount of coins circulating was out of control, and the royal guard was tasked to investigate what was happening. It was found that some counterfeiters were falsifying the coins and the currency value wasn’t as fair as it used to be, because the number of coins circulating was much higher and the prices weren’t fair anymore, creating an hyperinflation scenario. This made the currency to be depreciated and lose its value.
To solve this problem, the king came up with a solution: instead of providing the presses to the subjects, all coins would now be created in a central place. The Kingdom’s Mint was born. Now, many security measures were imposed and it was increasily difficult to falsify coins. Besides the inumerous security measures added to the process, now gold, a much rarer material, was used for creating the new coins.
This new process worked really well. The old coin was deprecated and, though some counterfeiters still tried to falsify the coins, it was now much harder and expensive to succeed. Besides that, it was clear to the subjects when somebody tried to fool themselves with false coins and the counterfeiters were immediatelly denounced to the king.
OpenSSL
![]()
OpenSSL is a software library for applications that secure communications over computer networks against eavesdropping or need to identify the party at the other end. It is widely used by Internet servers, including the majority of HTTPS websites.
OpenSSL contains an open-source implementation of the SSL and TLS protocols. The core library, written in the C programming language, implements basic cryptographic functions and provides various utility functions. Wrappers allowing the use of the OpenSSL library in a variety of computer languages are available.
The OpenSSL Software Foundation (OSF) represents the OpenSSL project in most legal capacities including contributor license agreements, managing donations, and so on. OpenSSL Software Services (OSS) also represents the OpenSSL project, for Support Contracts.
OpenSSL is available for most Unix-like operating systems (including Linux, macOS, and BSD) and Microsoft Windows.
Full reference here: https://www.openssl.org/
Creating the certificates
-
Create the certificate template
This sample was created for Ubuntu and Debian distributions
debian@busybox:~$ mkdir certificatesdebian@busybox:~$ cd certificatesReference: man 5 config
Reference: man 1 req
Reference: man 1 ca
Reference: man 1 x509debian@busybox:~/certificates$ cat <<EOF > config.conf [ req ] default_bits = 2048 default_md = sha256 distinguished_name = dn prompt = no [ dn ] C = BR ST = SP L = Campinas O = Kubernetes, Labs OU = Labs CN = \${ENV::CN} [ root ] basicConstraints = critical,CA:TRUE subjectKeyIdentifier = hash authorityKeyIdentifier = keyid:always,issuer keyUsage = critical,digitalSignature,keyEncipherment,keyCertSign,cRLSign [ ca ] basicConstraints = critical,CA:TRUE,pathlen:0 subjectKeyIdentifier = hash authorityKeyIdentifier = keyid:always,issuer:always keyUsage = critical,digitalSignature,keyEncipherment,keyCertSign,cRLSign [ server ] subjectKeyIdentifier = hash basicConstraints = critical,CA:FALSE extendedKeyUsage = serverAuth keyUsage = critical,keyEncipherment,dataEncipherment authorityKeyIdentifier = keyid,issuer:always subjectAltName = DNS:localhost,\${ENV::SAN},IP:127.0.0.1,IP:127.0.1.1 [ peer ] subjectKeyIdentifier = hash basicConstraints = critical,CA:FALSE extendedKeyUsage = serverAuth,clientAuth keyUsage = critical,keyEncipherment,dataEncipherment authorityKeyIdentifier = keyid,issuer:always subjectAltName = DNS:localhost,\${ENV::SAN},IP:127.0.0.1,IP:127.0.1.1 [ user ] subjectKeyIdentifier = hash basicConstraints = critical,CA:FALSE extendedKeyUsage = clientAuth keyUsage = critical,keyEncipherment,dataEncipherment authorityKeyIdentifier = keyid,issuer:always EOF -
Create the Root CA certificate
debian@busybox:~/certificates$ CN="Root, CA" SAN= \
    openssl req -x509 -newkey rsa:2048 -nodes \
        -keyout root-key.pem \
        -days 3650 \
        -config config.conf \
        -extensions root \
        -out root-cert.pem
Expected output:
Generating a RSA private key ...........................................................+++++ ...............+++++ writing new private key to 'root-cert.pem' ----- -
Create the intermediate
kubernetes-caCA certificate requestdebian@busybox:~/certificates$ CN="Kubernetes, CA" SAN= \ openssl req -newkey rsa:2048 -nodes \ -keyout ca-kubernetes-key.pem \ -config config.conf \ -out ca-kubernetes-cert.csrExpected output:
Generating a RSA private key ..........+++++ ......................................................................................+++++ writing new private key to 'ca-kubernetes-key.pem' ----- -
Create the intermediate
kubernetes-front-proxy-caCA certificate requestdebian@busybox:~/certificates$ CN="Kubernetes front proxy, CA" SAN= \ openssl req -newkey rsa:2048 -nodes \ -keyout ca-kubernetes-front-proxy-key.pem \ -config config.conf \ -out ca-kubernetes-front-proxy-cert.csrExpected output:
Generating a RSA private key ..........+++++ ......................................................................................+++++ writing new private key to 'ca-kubernetes-front-proxy-key.pem' ----- -
Create the intermediate
etcd-caCA certificate requestdebian@busybox:~/certificates$ CN="Etcd, CA" SAN= \ openssl req -newkey rsa:2048 -nodes \ -keyout ca-etcd-key.pem \ -config config.conf \ -out ca-etcd-cert.csrExpected output:
Generating a RSA private key ..........+++++ ......................................................................................+++++ writing new private key to 'ca-etcd-key.pem' ----- -
Create the intermediate
certificate-manager-caCA certificate requestdebian@busybox:~/certificates$ CN="Certificate Manager, CA" SAN= \ openssl req -newkey rsa:2048 -nodes \ -keyout ca-certificate-manager-key.pem \ -config config.conf \ -out ca-certificate-manager-cert.csrExpected output:
Generating a RSA private key ..........+++++ ......................................................................................+++++ writing new private key to 'ca-certificate-manager-key.pem' ----- -
Sign the intermediate
kubernetes-caCA certificate with the root CA certificatedebian@busybox:~/certificates$ CN="Kubernetes, CA" SAN= \ openssl x509 -req \ -extfile config.conf \ -extensions ca \ -in ca-kubernetes-cert.csr \ -CA root-cert.pem \ -CAkey root-key.pem \ -CAcreateserial \ -out ca-kubernetes-cert.pem \ -days 3650 -sha256Expected output:
Signature ok
subject=C = BR, ST = SP, L = Campinas, O = "Kubernetes, Labs", OU = Labs, CN = "Kubernetes, CA"
Getting CA Private Key
Create the intermediate
kubernetes-caCA certificate chaindebian@busybox:~/certificates$ cat ca-kubernetes-cert.pem root-cert.pem > ca-kubernetes-chain-cert.pem -
Sign the intermediate
kubernetes-front-proxy-caCA certificate with the root CA certificatedebian@busybox:~/certificates$ CN="Kubernetes front proxy, CA" SAN= \ openssl x509 -req \ -extfile config.conf \ -extensions ca \ -in ca-kubernetes-front-proxy-cert.csr \ -CA root-cert.pem \ -CAkey root-key.pem \ -CAcreateserial \ -out ca-kubernetes-front-proxy-cert.pem \ -days 3650 -sha256Expected output:
Signature ok
subject=C = BR, ST = SP, L = Campinas, O = "Kubernetes, Labs", OU = Labs, CN = "Kubernetes front proxy, CA"
Getting CA Private Key
Create the
kubernetes-front-proxy-caintermediate CA certificate chaindebian@busybox:~/certificates$ cat ca-kubernetes-front-proxy-cert.pem root-cert.pem > ca-kubernetes-front-proxy-chain-cert.pem -
Sign the intermediate
etcd-caCA certificate with the root CA certificatedebian@busybox:~/certificates$ CN="Etcd, CA" SAN= \ openssl x509 -req \ -extfile config.conf \ -extensions ca \ -in ca-etcd-cert.csr \ -CA root-cert.pem \ -CAkey root-key.pem \ -CAcreateserial \ -out ca-etcd-cert.pem \ -days 3650 -sha256Expected output:
Signature ok
subject=C = BR, ST = SP, L = Campinas, O = "Kubernetes, Labs", OU = Labs, CN = "Etcd, CA"
Getting CA Private Key
Create the intermediate
etcd-caCA certificate chaindebian@busybox:~/certificates$ cat ca-etcd-cert.pem root-cert.pem > ca-etcd-chain-cert.pem -
Sign the intermediate
certificate-manager-caCA certificate with the root CA certificatedebian@busybox:~/certificates$ CN="Certificate Manager, CA" SAN= \ openssl x509 -req \ -extfile config.conf \ -extensions ca \ -in ca-certificate-manager-cert.csr \ -CA root-cert.pem \ -CAkey root-key.pem \ -CAcreateserial \ -out ca-certificate-manager-cert.pem \ -days 3650 -sha256Expected output:
Signature ok
subject=C = BR, ST = SP, L = Campinas, O = "Kubernetes, Labs", OU = Labs, CN = "Certificate Manager, CA"
Getting CA Private Key
Create the intermediate
etcd-caCA certificate chaindebian@busybox:~/certificates$ cat ca-certificate-manager-cert.pem root-cert.pem > ca-certificate-manager-chain-cert.pem -
Verify the signatures
debian@busybox:~/certificates$ for instance in ca-kubernetes ca-kubernetes-front-proxy ca-certificate-manager ca-etcd; do
   openssl verify -CAfile root-cert.pem ${instance}-cert.pem
done
Expected output:
ca-kubernetes-cert.pem: OK
ca-kubernetes-front-proxy-cert.pem: OK
ca-certificate-manager-cert.pem: OK
ca-etcd-cert.pem: OK
Summary
In this process, we:
- Created the root certificate;
- Create an intermediary certificate for each component of our cluster (
kubernetes-ca,kubernetes-front-proxy-ca,etcd-caandcertificate-manager-ca) and sign them with the root certificate; - Create the final certificates for each component, signing them with their respective intermediary certificates previously created;